
At a Glance
Grease on the cabinets, lingering smoke, and poor airflow are all signs your current ventilation is no longer doing its job. Over time, that buildup can stain or damage cabinet finishes while making everyday cooking less comfortable. Learning how to install a range hood can help restore proper ventilation, keep your cooking area cleaner, and move smoke and odors out of the kitchen more effectively.
John's Appliance & Bedding makes finding the right fit easier. Our experts can help you compare six powerful under cabinet range hoods from 24 to 36 inches across three design lines, match the right model to your existing layout, and avoid costly sizing mistakes before installation begins.
Stop Wiping Grease Off Your Kitchen Cabinets
Browse 6 powerful models from 24 to 36 inches and find the exact fit for your cooking space.
Key Takeaways
- Clearance Matters: Measuring the cabinet width and the distance from the cooktop to the bottom rim prevents heat damage.
- Venting Options: An under cabinet model vents through the rear wall, up through the ceiling, or recirculates air back into the room.
- Pulling Power: Units move between 220 and 1000 CFM of air to clear cooking smoke efficiently.
- Electrical Safety: Installation demands exact wiring connections to a dedicated household breaker to prevent hazardous shocks.
How Much Clearance Do I Need to Install an Under Cabinet Range Hood?
The mounting bracket sets the foundation for your new ventilation system. You must measure the space below the upper cabinets before learning how to install a range hood. The distance from the cooking surface to the bottom of the exhaust unit dictates how well the fan captures smoke.
You risk melting the plastic controls if the metal chassis sits too close to extremely intense heat. Heat damage ruins the wooden finish quickly. You want the fan sitting high enough to give your tall stockpots room. An exhaust motor struggles to catch grease if placed too high above the burners.
Width Measurements
Your tape measure must stretch across the entire cabinet opening. You need the exact span between the left and right wooden sides. A 30-inch unit requires exactly 30 inches of clearance. The housing will not fit into a gap measuring 29.5 inches.
You have to measure the depth from the back wall to the front edge. Your new purchase must not stick out far beyond the cabinet doors. This alignment keeps your cooking space looking sharp. You bump your head if the front edge extends too far.
Vertical Distances
The gap between the burners and the grease filters matters most. You generally leave 24 to 30 inches of vertical space. Your specific cooktop manual lists the exact minimum requirement. Gas burners produce more heat than electric coils. You place the exhaust fan higher over gas flames to prevent fire hazards.
The power cord needs enough slack to reach the junction box inside the wall. The blower motor works hardest when installed at the maximum allowed height. You capture steam effectively when following the exact dimensions in the manual. Your local codes might mandate specific heights. You avoid heavy fines by following the rules.
What Tools Do I Need Before I Install a New Range Hood?
Exactly 120 volts run through the wall wires behind your kitchen cabinets. You gather specific hand tools before touching any electrical lines. A voltage tester keeps you alive during kitchen exhaust fan installation. You flip the correct breaker switch at the main panel first. Your tester confirms the power is completely off.
The heavy metal housing demands proper support. You need a drill to drive screws into the wooden studs. A manual screwdriver tightens the wire nuts securely. Your hands get tired quickly when driving long screws manually. You need wire strippers to expose fresh copper on the house lines.
Proper cabinet preparation for vent hood placement requires precision. You mark the exact drilling locations with a pencil. Your hands stay free when using a magnetic level to check the alignment. The metal box must sit flat against the wall.
Your tool belt should hold a pair of safety glasses. You protect your eyes from falling sawdust while drilling up into the upper wood box. The metal edges on the exhaust unit are sharp. You wear leather work gloves to prevent deep cuts.
A stud finder locates the solid wood behind the drywall. You cannot rely on hollow drywall anchors to hold a 50-pound appliance. The entire machine crashes down onto the glass cooktop if not anchored into wood studs. You need a second ladder for your helper.
One person holds the heavy steel box while the other drives the mounting screws tight. The process moves faster when all tools sit within easy reach. Your helper hands you the wire nuts when you finish twisting the copper lines together.
- Wire connectors: You twist these plastic caps over the spliced copper ends to prevent short circuits.
- Mounting screws: The manufacturer provides exact lengths meant to hold heavy steel without piercing the cabinet interior.
- Foil tape: You seal the 7-inch round metal duct joints to keep grease from leaking into the ceiling.
Ducted Vs Ductless Installation Requirements
Comparing the capacities and dimensions helps you pick the exact unit for your kitchen.
| Model | Width | Depth | Max CFM |
|---|---|---|---|
| Thermador Masterpiece 36-Inch | 36 inches | 23.13 inches | 1000 CFM |
| GE 30-Inch | 30 inches | 20 inches | 310 CFM |
| ZLINE 30-Inch | 30 inches | 22 inches | 600 CFM |
| Zephyr Hurricane 36-Inch | 36 inches | 22.13 inches | 695 CFM |
| Frigidaire 30-Inch | 30 inches | 19.75 inches | 220 CFM |
| Bosch 500 Series 24-Inch | 24 inches | 11.81 inches | 400 CFM |
Professional Vs DIY Installation Expectations
Lifting a steel box over a glass stove requires serious physical effort. You struggle to align the mounting holes while balancing the large appliance on your shoulders. Expert installers handle this exact lifting daily. Your local experts bring the correct ladders and padding to protect your countertops.
You risk shattering the glass burners if the unit slips from your hands. The electrical connections present another significant hazard during this job. A licensed electrician wires the system to household current safely. You face a severe shock risk if you misidentify the hot wires.
The metal casing becomes electrified if the ground wire sits loose. You trip the main breaker repeatedly if the hot and neutral lines touch. Expert installers test the voltage before applying the final wire nuts.
| Approach | Time Required | Risk Level |
|---|---|---|
| Solo DIY | 4 to 6 hours | High physical risk |
| DIY with Helper | 3 to 4 hours | Moderate physical risk |
| Professional Team | 1 to 2 hours | No physical risk |
When you replace microwave with range hood units, the mounting brackets rarely match. Your DIY effort hits a wall when the old holes do not line up. You spend hours patching drywall and drilling new anchors. Trained technicians carry extra brackets in their vans.
You save an entire Saturday by letting experts handle the alignment. Learning how to install a range hood takes careful reading of the manual. Your warranty stays intact when a certified installer signs the paperwork. The retailer guarantees the labor when their team completes the job.
The pros clean up the sawdust and remove the old microwave from your house. You avoid a trip to the recycling center on your weekend. Your kitchen goes back to normal operation the same afternoon. The experts test the fan speeds and the lighting before they walk out the door. You enjoy the cooking experience sooner.
Which Range Hood Designs Are Easiest to Mount?
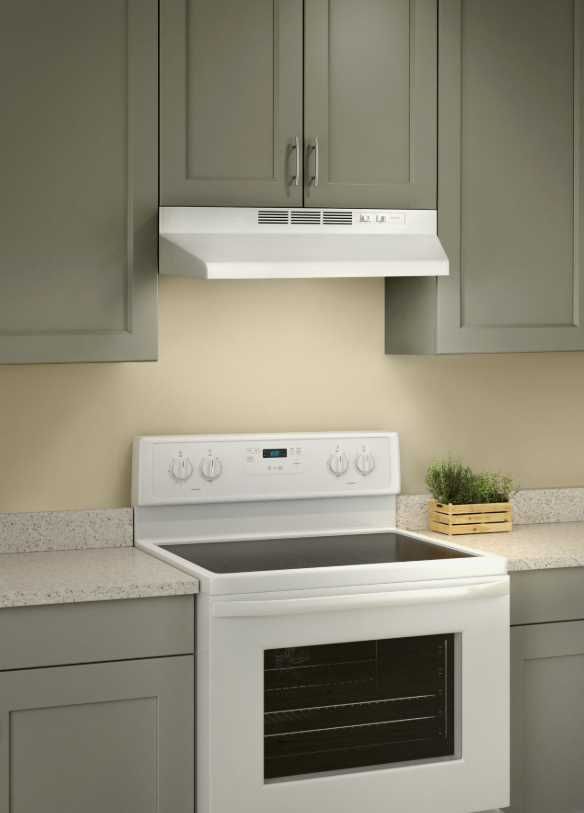
The space under the upper cabinets dictates how easily the new appliance slides into position. You encounter different mounting systems across the brands. GE uses an electronic backlit control panel, but the housing supports a fast setup process. One person completes the GE unit mounting in 10 minutes or less.
You save a huge amount of frustration with that fast system. Zephyr relies on filter-less self-cleaning systems, keeping the interior profile simple. You lift the Zephyr housing without worrying about loose metal baffles falling out. Bosch changes the spatial requirements entirely with a pull-out visor design. You slide the Bosch visor flush with the cabinets when not cooking.
Your venting layout impacts the physical mounting struggle.
The vented vs ductless range hood debate matters here. A 10-inch duct hole for the Thermador requires a large ceiling cutout. You spend more time cutting wood to fit that large pipe. ZLINE offers a standard 30-inch frame with straightforward top venting.
Frigidaire offers a built-in look while providing charcoal filters for spaces lacking exterior ductwork. You skip the duct cutting entirely with the Frigidaire charcoal setup.
Fitting a Vented Duct System
Suppose your kitchen holds an existing 7-inch round metal duct in the wall. You slide the GE 30-inch model directly over that 7-inch opening. The collar on the GE unit matches the wall pipe exactly. You wrap foil tape around the joint to stop air leaks.
The 310 CFM blower pushes smoke directly into that tight seal. You finish the connection without needing expensive adapter collars. Your ceiling stays free of new holes. You just tighten two screws to secure the metal damper flap. The flap prevents cold drafts from entering your warm house during winter months.
➜ Learn More: 4 Types of Kitchen Range Hoods to Know
Steps To Mount and Wire Your Under Cabinet Hood
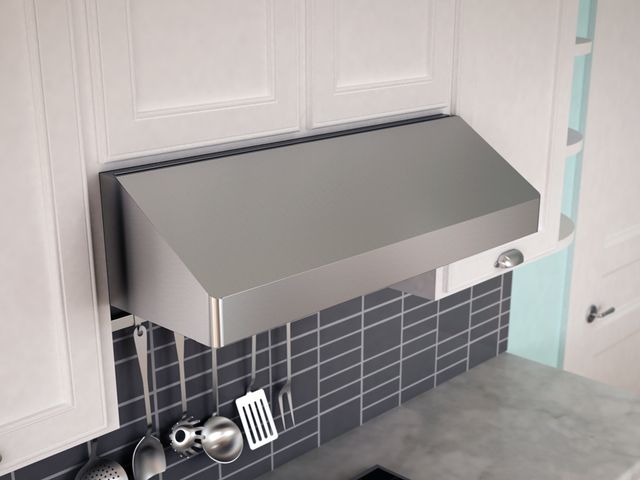
Stainless steel bends permanently if you drop the chassis during the electrical wiring for range hood systems. You protect that shiny metal by leaving the plastic film on until the very end. Your helper holds the heavy steel frame while you pull the house wires through the knockout hole.
The copper lines must slide cleanly through the metal clamp. You must tighten the metal clamp to keep the sharp edges from slicing the insulation. The house wiring connects directly to the black and white appliance wires inside the internal junction box. You twist the wire nuts tightly to prevent arcing. Learning how to install a range hood demands strict attention to these copper connections.
Attaching to the Cabinets
The range hood mounting brackets hold the entire weight of the fan motor. You drive these brackets into the solid wood framing at the cabinet base. The metal chassis lifts up and slots securely onto those brackets.
You drive the final retaining screws through the top sheet metal and into the wood. The unit remains fully supported from above. Your helper finally lets go of the steel frame. You check the unit with a level to confirm the correct pitch.
Connecting the Ventilation
Your next step is the range hood ductwork installation. You align the top exhaust collar with the pipe protruding from your ceiling. You wrap the joint with aluminum foil tape. You install the charcoal filters instead for a recirculating hood vent setup.
The recirculating setup requires no exterior ducting. You snap the metal grease screens into the lower tracks. You restore power at the breaker panel and test the fan speeds. The LED bulbs illuminate the cooking surface brightly. Your project finishes when the motor hums quietly on the highest setting.
Top Under Cabinet Range Hoods for Your Kitchen
Our curated selection highlights six distinct units matching different cabinet configurations. You find exact dimensions below to match your unique kitchen cutout perfectly.
Thermador Masterpiece 36" Stainless Steel Under Cabinet Range Hood
Shop Thermador Under Cabinet Range Hoods
Best for: homeowners building a connected smart kitchen
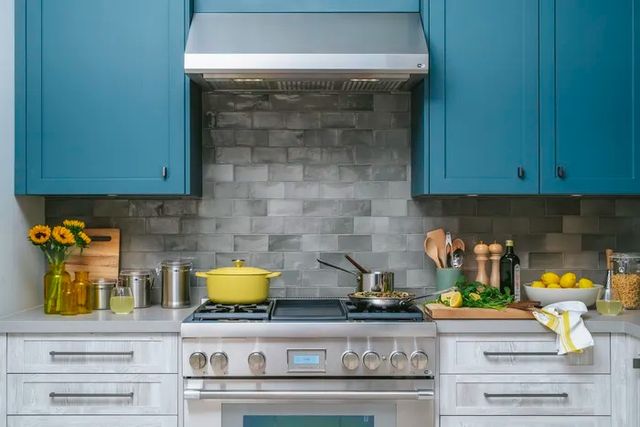
The Masterpiece line brings commercial power to your home kitchen with a blower pushing 1000 CFM of air. You connect the fan directly to your Freedom induction cooktop using the integrated Cooktop Hood Sync. This Smart connectivity link activates the fan automatically when you start cooking. The Noise Control Technology lowers the operating volume to 2.5 sones on the highest setting. Your guests hear your conversations clearly while the internal motor runs. A 10-inch duct handles the exhaust volume very efficiently. You get a full 2 Year Parts and Labor warranty coverage.
Top Features
- Airflow: The blower moves 1000 CFM of air on maximum speed.
- Sound: The motor produces just 2.5 sones of noise.
- Finish: A stainless steel exterior cleans up with a damp cloth.
GE 30" Stainless Steel Under Cabinet Range Hood
Shop GE Under Cabinet Range Hoods
Best for: buyers replacing an older 30-inch unit on a weekend
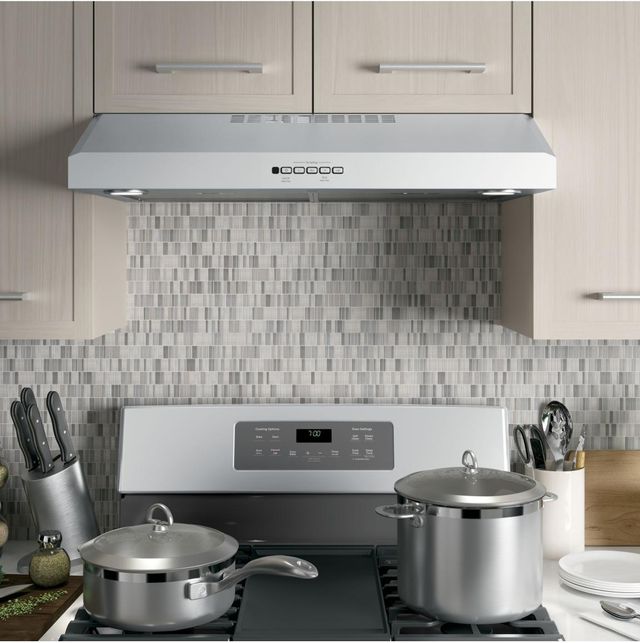
This stainless steel unit moves 310 CFM of air through either a Vertical and rear exhaust pipe. You choose the exact venting path that matches your wall structure. The Electronic backlit controls glow brightly in a dark kitchen. You press the large buttons easily when your hands are wet. Dual halogen lighting with nightlight settings illuminates the stovetop below. You simmer delicate sauces under that focused light. One person mounts the 20-inch deep chassis in under 10 minutes. A 7-inch round metal duct fits the top collar securely. The blower generates 7 sones of noise on the boost speed. The manufacturer provides a standard 1 Year Parts and Labor warranty term.
Top Features
- Ducting: A 7-inch round duct connects securely to the top collar.
- Dimensions: The 5.5-inch height leaves plenty of vertical space below the cabinet.
- Finish: The stainless steel matches modern kitchen hardware.
ZLINE 30" Stainless Steel Under Cabinet Range Hood with LED Lighting
Shop ZLINE Under Cabinet Range Hoods
Best for: cooks who fry greasy foods frequently
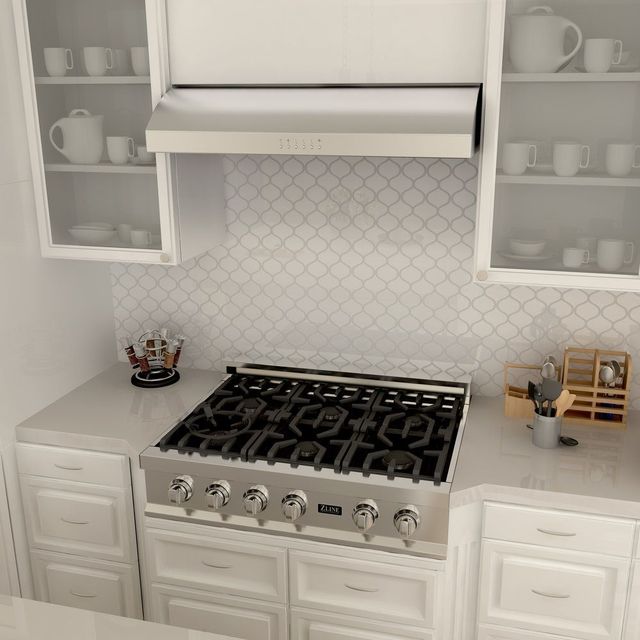
A 600 CFM blower sits inside this 30-inch frame to pull heavy cooking smoke out of your kitchen. You select from four distinct fan speeds to match the cooking intensity. The LED Lighting highlights your pots and pans clearly. You monitor a rolling boil easily under those bright bulbs. The 7-inch round duct channels the hot air completely outside. You rely on a 3 Year Parts warranty, while the internal exhaust fan carries a Lifetime Motor guarantee against mechanical failure.
Top Features
- Airflow: The fan pulls 600 CFM of air away from the burners.
- Depth: A 22-inch deep frame covers the front burners entirely.
- Warranty: You get a 3 Year Parts protection plan.
Zephyr Hurricane 36" Stainless Steel Under Cabinet Range Hood
Shop Zephyr Under Cabinet Range Hoods
Best for: homes requiring restricted exhaust capacities
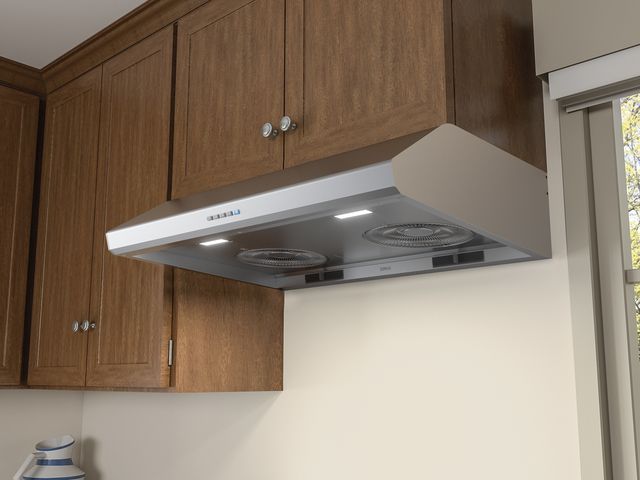
You handle serious smoke with a massive 695 CFM motor running at 5.5 sones on the highest setting. The manufacturer includes Airflow Control Technology to limit the maximum exhaust speed if your local building codes restrict exhaust volume. This ACT system prevents you from failing a strict municipal inspection. The 36-inch chassis connects to either a 7-inch round pipe or a rectangular metal duct measuring 3-1/4 by 10 inches. A filter-less self-cleaning mechanism keeps the steel interior free of grease buildup. You gain long peace of mind with a 10 Year Parts and 1 Year Labor warranty coverage.
Top Features
- Sound: The blower tops out at 5.5 sones.
- Dimensions: A 36-inch width spans wide home cooktops.
- Warranty: The manufacturer covers parts for 10 full years.
Frigidaire 30" Stainless Steel Under Cabinet Range Hood
Shop Frigidaire Under Cabinet Range Hoods
Best for: apartments lacking exterior wall vents
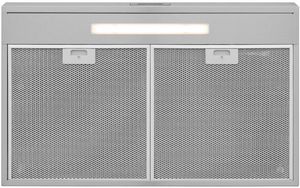
Measuring just under 5 inches tall, the 30-inch chassis fits comfortably into tight spaces. You capture steam effectively using the Refresh Air with Two Speed Fan system running at 220 CFM. A Carbon Charcoal Filter Included inside the box means you can install this unit without exterior ducts. The Filter Indicator Light tells you when to swap that charcoal insert out. You wash the metal grease screens in your dishwasher. The exhaust noise hits 5.8 sones. You receive a 1 Year Parts and Labor warranty.
Top Features
- Airflow: The motor circulates 220 CFM of air.
- Dimensions: The 4.94-inch height profile saves vertical space.
- Warranty: A 1 Year Parts and Labor warranty protects the purchase.
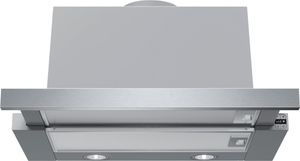
Bosch 500 Series 24" Stainless Steel Pull-Out Under Cabinet Hood
Shop Bosch Under Cabinet Range Hoods
Best for: galley kitchens with compact 24-inch cutouts
Your tight apartment kitchen layout benefits from a narrow 24-inch chassis that sits exactly flush with the adjacent cabinetry. You slide the front visor out only when the burners run. The General Properties group includes touch controls and a bright LCD screen on the front panel. You tap those smooth buttons to activate the 400 CFM integrated blower. The 6-inch metal exhaust duct pushes the cooking smells outside very quickly. You connect an extra separate accessory kit to run this machine in recirculation mode instead. You save vital headroom with the 11.81-inch vertical height. The stainless steel exterior finish matches your modern oven perfectly.
Top Features
- Airflow: An integrated blower delivers 400 CFM of pulling power.
- Ducting: A 6-inch duct collar handles the exhaust pipe.
- Dimensions: The 11.81-inch depth slides flush when closed.
Upgrade Your Ventilation at John's Appliance & Bedding
A properly installed under cabinet range hood helps keep your kitchen fresher, cleaner, and better protected from heat, smoke, and grease. Careful measurements, correct clearance, and proper electrical connections also help create a safer, more effective ventilation setup that works with your existing kitchen layout.
John's Appliance & Bedding can help you find the right under cabinet range hood for your space. Our showroom experts will walk you through sizing, ventilation requirements, and key features, with professional installation and dependable local service to make upgrading your kitchen easier.
➜ Learn More: Best Wall Mounted Range Hood Brands for Style & Performance
Frequently Asked Questions about How to Install a Range Hood
A licensed electrician connects a hardwired range hood to your home breaker panel safely. Professional wiring prevents severe electrical shocks and fire hazards inside the wall.
One person easily mounts lighter under cabinet models that feature special installation brackets. You always need a second helper to lift units weighing over 40 pounds safely.
A hardwired unit connects directly to the copper lines inside the wall junction box. A plug-in model draws 120 volts from a standard three-prong wall outlet.
You attach the mounting screws directly into the solid wood studs behind the drywall. Hollow drywall anchors fail to support the 50-pound steel chassis safely.
You measure the diameter of the existing wall pipe with a tape measure. A 1000 CFM blower requires a 10-inch duct to move air without extreme noise.
You send the exhaust through an old microwave duct if the dimensions match the new collar. A powerful 600 CFM motor overwhelms a narrow 4-inch pipe quickly.
Why Trust John’s Appliance & Bedding?
Our family-owned and operated store started with a pick-up truck and a dream. When John Hinton Jr. first opened his storefront in 1972, he never envisioned that over the next 50 years, he would outgrow his flagship location and need to open several other locations. However, that’s just what he did.
Thanks to John and his team, John’s Appliance & Bedding has been able to provide our customers with the best appliances, mattresses, and cabinet solutions in South Florida. We view our customers as an extension of our family and seek to provide the best service and expertise that we always have.
Shop Under Cabinet Range Hoods at John’s Appliance & Bedding
At John’s Appliance & Bedding, we provide high-quality, name-brand products at the best possible price. Shop appliances online or visit one of our four South Florida showrooms and experience world-class customer service. Our friendly product experts are always happy to help you find the best under cabinet range hood for your home—whether you call us, use our online chat feature, or visit us in person.